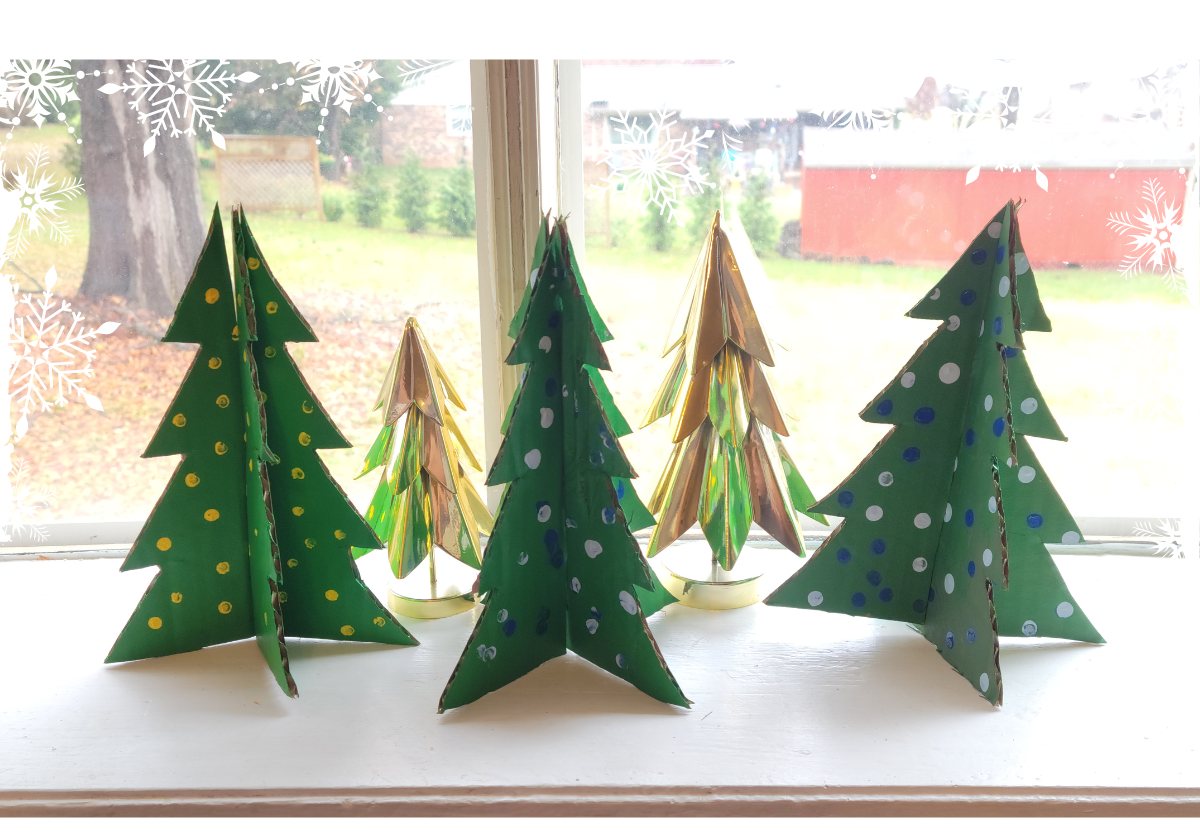
I recently saw a set of three 12" cardboard Christmas trees on one of my favorite home décor sites- on sale for $40. For cardboard. No judgement if you've made holiday purchases like that, but when chicken is $10 at the grocery store we are going to DIY this craft.
Although the online version is more clean and modern, this made for a fun craft with the kids. It comes together as fast as paint can dry, and makes a great boredom buster for Holiday break. All you really need is some cardboard, paint, a dotting tool (a pencil eraser, a Q-Tip, something like that) and a tree stencil (you can print one, like I did, or use a cookie cutter!).
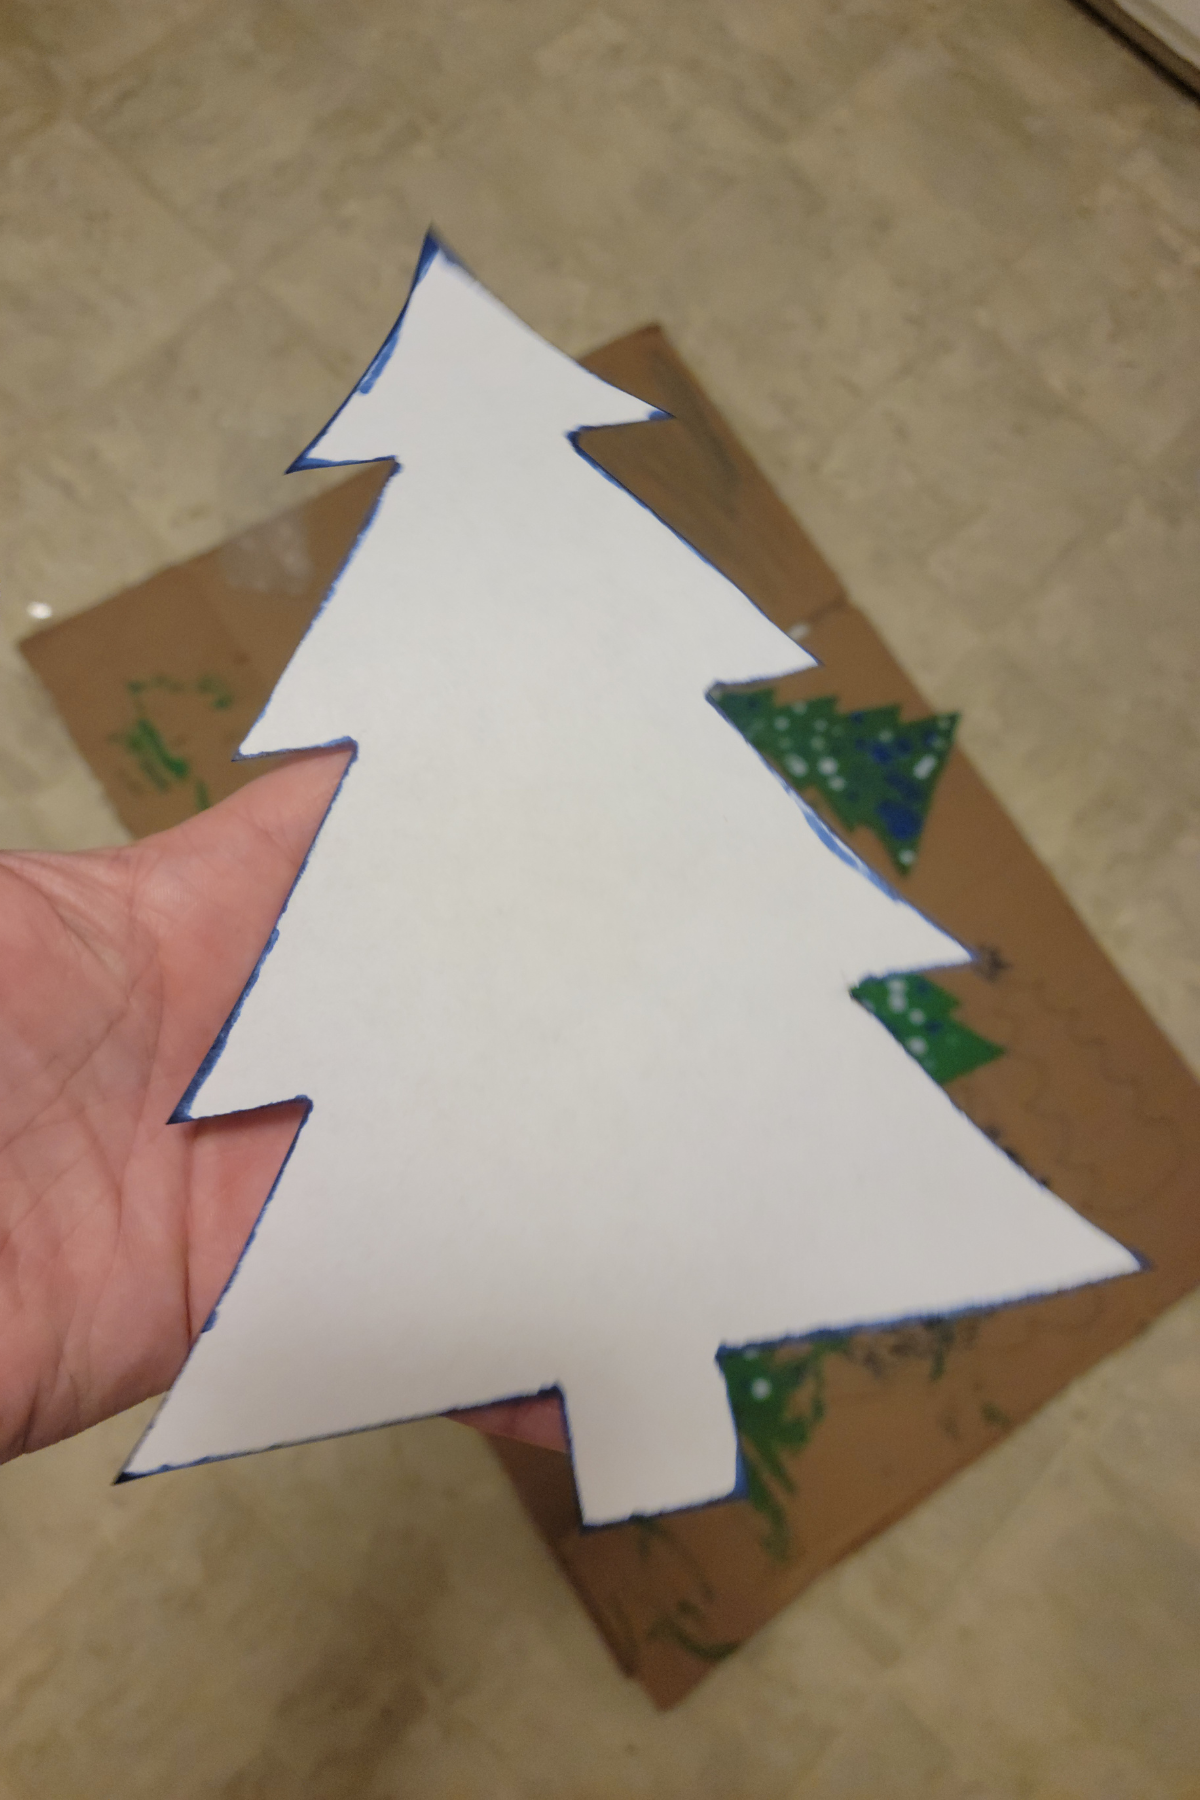
If you're printing your tree look for a easy to cut, simple shape. Print, Cut, and trace it onto your cardboard. You'll need to cut out two cardboard trees for each tree on your farm. Use different sizes for variety! Tracing and cutting activities are great for independent finger movements, strengthening hand muscles and bilateral coordination, improving visual motor skills, fine motor skills, focus and attention. Of course if you're doing this with very littles, save yourself some time (and sanity) and pre-cut your cardboard.
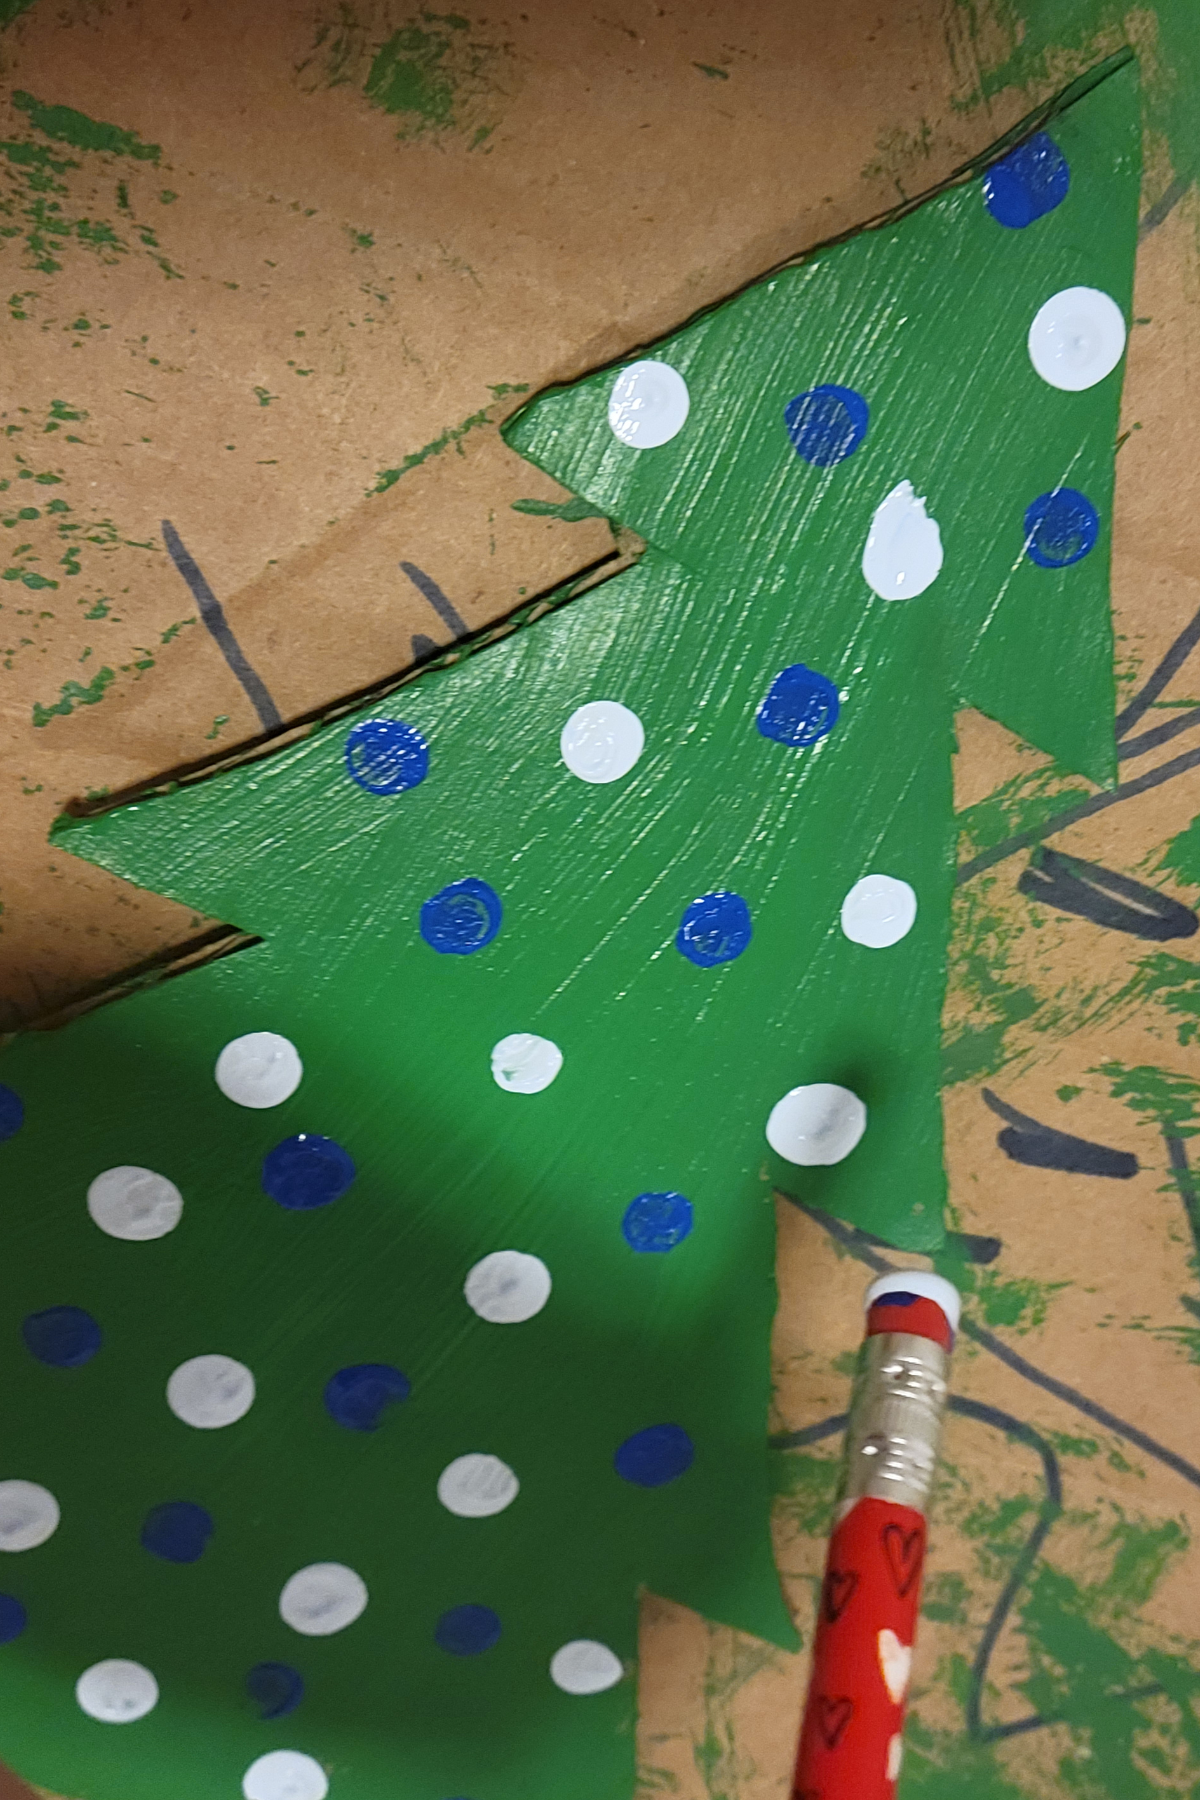
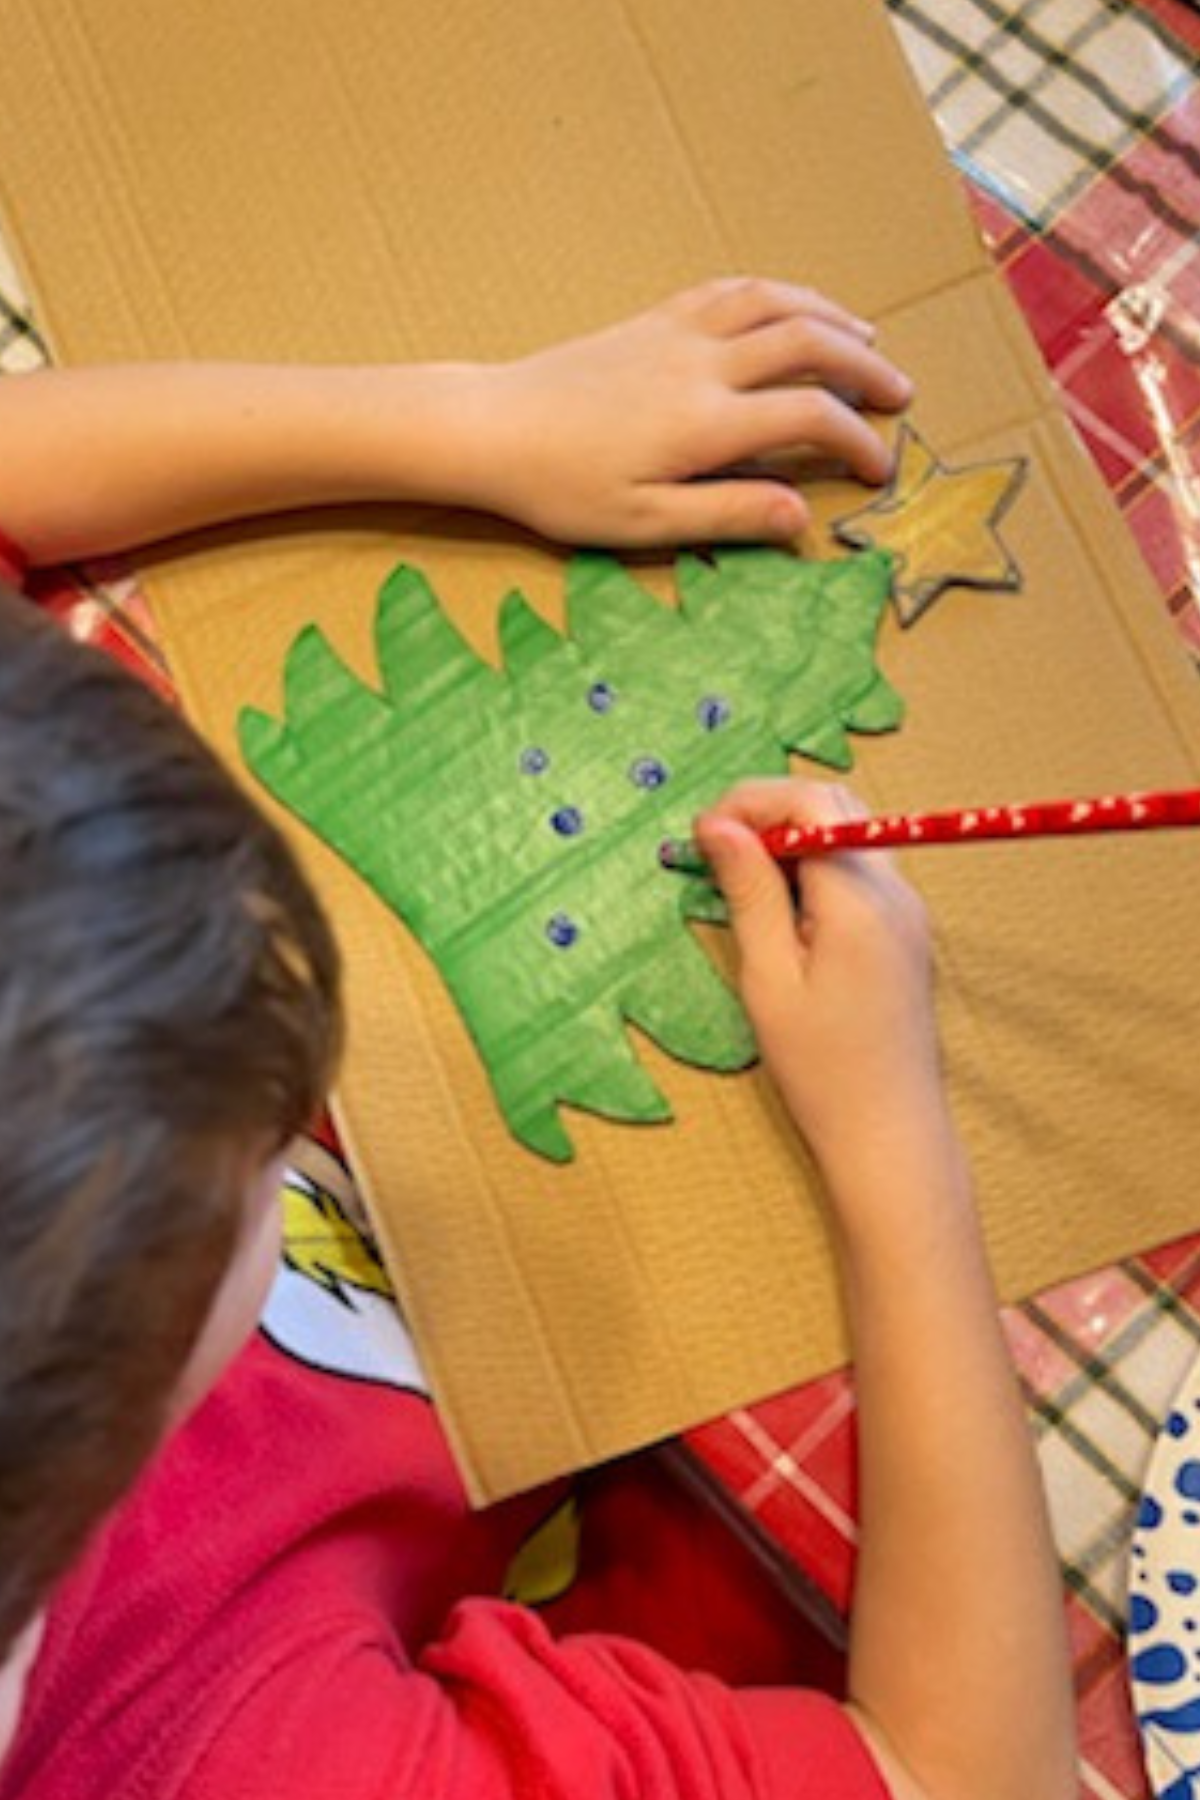
Paint each side of your cutouts green (or whatever color you want!). Once it's dry it's time to deck the tree. We dipped the eraser of a pencil into some paint and dotted away. Again, be sure to do both sides!
 |  |  |
Once dry, find the center of the tree. You are going to make a cut from the center point to the top of one tree, and from the center to the bottom of the other tree. You'll use these slits to nest your tree pieces together and create a 3D tree.
 |
You could also decorate your tree by gluing on colorful pompoms, sequins, beads, candy - the options are limitless. Add a string of fairy lights and a for sale sign, and your Elf on the Shelf can have his own little Christmas tree farm. Have fun!